連載の一覧はここ
ここを参考にGentooをインストールする。
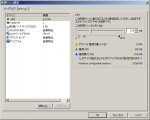
VMWare Playerを起動して新しい仮想マシンを作る。

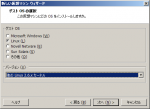
選べるゲストOSにgentooがないので、Linux2.6.xカーネルを選ぶ。


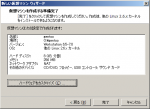
仮想マシンを作成した後、再び編集していくつか変える。
- メモリを512Mに
- USBを削除
- ハードディスクをIDE8Gに(前のファイルは削除)
- ネットワークアダプタはブリッジ接続に
rr
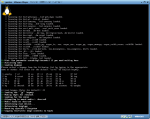
gentooのウェブサイトからinstall-x86-minimal-20110809.isoをダウンロードして、CDROMに接続して仮想マシンを起動する。
CDから起動してboot: のプロンプトが出たらリターンを押す。途中のキーマップのところで22を入力(遅いと勝手に進んでしまう)
プロンプトが表示されたら、ルートのパスワード設定、ユーザの追加、ネットワークの立ち上げ、sshdの起動を行う。(dhcpを使わない場合は net-setup eth0 でマニュアル設定できる)
|
1 2 3 4 5 6 7 8 9 10 |
# passwd ... # useradd -m -G users ebisu # passwd ebisu ... # dhcpcd eth0 ... # ifconfig ... # |
sshdの設定を変えてパスワードでのログインを許可する。
|
1 |
# nano -w /etc/ssh/sshd_config |
ここで
PasswordAuthentication no
を
PasswordAuthentication yes
に変える。
sshdの起動
|
1 2 3 |
# /etc/init.d/sshd start ... # |
パーティションを設定する。ここではパーティションは1つにして、スワップはファイルで行うようにする。VMwareなので後々ディスクを拡張したりするときにこの方がらくだと思われる。
|
1 2 3 4 5 6 7 8 9 10 11 12 13 14 15 16 17 18 19 20 21 22 23 24 25 26 27 28 29 30 31 32 33 34 35 36 37 38 39 40 41 42 43 44 45 46 47 48 49 50 51 52 53 54 55 56 57 58 59 60 61 62 63 64 65 66 67 68 69 70 |
livecd ~ # fdisk -l Disk /dev/sda: 8589 MB, 8589934592 bytes 255 heads, 63 sectors/track, 1044 cylinders, total 16777216 sectors Units = sectors of 1 * 512 = 512 bytes Sector size (logical/physical): 512 bytes / 512 bytes I/O size (minimum/optimal): 512 bytes / 512 bytes Disk identifier: 0x00000000 Disk /dev/sda doesn't contain a valid partition table livecd ~ # fdisk /dev/sda Device contains neither a valid DOS partition table, nor Sun, SGI or OSF disklabel Building a new DOS disklabel with disk identifier 0x80bd45cb. Changes will remain in memory only, until you decide to write them. After that, of course, the previous content won't be recoverable. Warning: invalid flag 0x0000 of partition table 4 will be corrected by w(rite) Command (m for help): n Command action e extended p primary partition (1-4) p Partition number (1-4, default 1): Using default value 1 First sector (2048-16777215, default 2048): Using default value 2048 Last sector, +sectors or +size{K,M,G} (2048-16777215, default 16777215): Using default value 16777215 Command (m for help): m Command action a toggle a bootable flag b edit bsd disklabel c toggle the dos compatibility flag d delete a partition l list known partition types m print this menu n add a new partition o create a new empty DOS partition table p print the partition table q quit without saving changes s create a new empty Sun disklabel t change a partition's system id u change display/entry units v verify the partition table w write table to disk and exit x extra functionality (experts only) Command (m for help): a Partition number (1-4): 1 Command (m for help): p Disk /dev/sda: 8589 MB, 8589934592 bytes 255 heads, 63 sectors/track, 1044 cylinders, total 16777216 sectors Units = sectors of 1 * 512 = 512 bytes Sector size (logical/physical): 512 bytes / 512 bytes I/O size (minimum/optimal): 512 bytes / 512 bytes Disk identifier: 0x80bd45cb Device Boot Start End Blocks Id System /dev/sda1 * 2048 16777215 8387584 83 Linux Command (m for help): w The partition table has been altered! Calling ioctl() to re-read partition table. Syncing disks. livecd ~ # |
ext3を作成
|
1 2 3 4 5 6 7 8 9 10 11 12 13 14 15 16 17 18 19 20 21 22 23 24 |
livecd ~ # mkfs.ext3 /dev/sda1 mke2fs 1.41.12 (17-May-2010) Filesystem label= OS type: Linux Block size=4096 (log=2) Fragment size=4096 (log=2) Stride=0 blocks, Stripe width=0 blocks 524288 inodes, 2096896 blocks 104844 blocks (5.00%) reserved for the super user First data block=0 Maximum filesystem blocks=2147483648 64 block groups 32768 blocks per group, 32768 fragments per group 8192 inodes per group Superblock backups stored on blocks: 32768, 98304, 163840, 229376, 294912, 819200, 884736, 1605632 Writing inode tables: done Creating journal (32768 blocks): done Writing superblocks and filesystem accounting information: done This filesystem will be automatically checked every 28 mounts or 180 days, whichever comes first. Use tune2fs -c or -i to override. livecd ~ # |
マウントしてswapファイルの作成
|
1 2 3 4 5 6 7 8 9 10 11 12 13 14 |
livecd ~ # mount /dev/sda1 /mnt/gentoo livecd ~ # mkdir /mnt/gentoo/swap livecd ~ # dd if=/dev/zero of=/mnt/gentoo/swap/swap0 bs=1024K count=512 512+0 records in 512+0 records out 536870912 bytes (537 MB) copied, 3.28316 s, 164 MB/s livecd ~ # mkswap /mnt/gentoo/swap/swap0 Setting up swapspace version 1, size = 524284 KiB no label, UUID=34d5a4f7-49c8-4fa6-ae74-3f7f2296e59f livecd ~ # swapon /mnt/gentoo/swap/swap0 livecd ~ # cat /proc/swaps Filename Type Size Used Priority /mnt/gentoo/swap/swap0 file 524284 0 -1 livecd ~ # |
ハードディスクを作成して、スワップ領域も作成した。次にstage3といわれるファイルをダウンロードする。ダウンロードする場所はマウントした/mnt/gentooにする。
|
1 |
livecd gentoo # links http://www.gentoo.org/main/en/mirrors.xml |
|
1 |
livecd gentoo # tar xvjpf stage3-i686-20110809.tar.bz2 |
Portageというソフトウェア情報ファイル一群をダウンロード。
|
1 2 |
livecd gentoo # cd /mnt/gentoo/ livecd gentoo # links http://www.gentoo.org/main/en/mirrors.xml |
展開
|
1 2 3 4 |
livecd gentoo # ls bin dev home lost+found mnt portage-latest.tar.bz2 root stage3-i686-20110809.tar.bz2 sys usr boot etc lib media opt proc sbin swap tmp var livecd gentoo # tar xvjf /mnt/gentoo/portage-latest.tar.bz2 -C /mnt/gentoo/usr |
chrootの前にリゾルバ情報をコピー。入ってからだと/etc/resolv.confが見えなくなり、dhcpcdもまだ入ってない。
|
1 |
livecd gentoo # cp -L /etc/resolv.conf /mnt/gentoo/etc/ |
procとdevをマウントしてからchroot
|
1 2 3 4 5 6 7 |
livecd gentoo # mount -t proc none /mnt/gentoo/proc livecd gentoo # mount --rbind /dev /mnt/gentoo/dev livecd gentoo # chroot /mnt/gentoo /bin/bash livecd / # env-update >>> Regenerating /etc/ld.so.cache... livecd / # source /etc/profile livecd / # |
タイムゾーン情報をコピーして、時刻を合わせる。以下の例は8/29 11:00。
|
1 2 |
livecd / # cp /usr/share/zoneinfo/Asia/Tokyo /etc/localtime livecd / # date 08291100 |
Portageをアップデート
|
1 |
# emerge --sync |
Linuxカーネルソースをインストール
|
1 |
livecd / # emerge gentoo-sources |
カーネルのコンフィグをする前に自分のマシンの環境を確認するためにpciutilsをインストールして、lspciやlsmodで今の状態を調べる。ここも参考になる。とくにAMD PCnet32 PCI supportをモジュールとしてインストールことが大切らしい。
|
1 2 3 |
livecd / # emerge pciutils livecd / # lspci livecd / # lsmod |
カーネルコンフィグ
|
1 2 |
livecd / # cd /usr/src/linux livecd linux # make menuconfig |
プロセッサファミリーでAthron64を選択

あとは適当に選択
makeして/bootにコピー。ここでは名前は簡単のためkにした。
|
1 2 |
livecd linux # make && make modules_install livecd linux # cp arch/i386/boot/bzImage /boot/k |
fstabの作成。ここでのハードディスクはパーティションが1つでスワップは/swap/swap0のファイルで行っているので以下のような/etc/fstabを作成。
|
1 2 3 |
/dev/sda1 / ext3 noatime 0 1 /dev/cdrom /mnt/cdrom auto noauto,ro 0 0 /swap/swap0 swap swap default 0 0 |
必要なものインストール
|
1 2 3 4 5 |
livecd linux # emerge dhcpcd livecd linux # emerge syslog-ng livecd linux # rc-update add syslog-ng default livecd linux # emerge vixie-cron livecd linux # rc-update add vixie-cron default |
grubをインストールしてgrub.confを設定
|
1 2 |
livecd linux # emerge grub livecd linux # nano -w /boot/grub/grub.conf |
|
1 2 3 4 5 6 7 8 |
default 0 timeout 30 #splashimage=(hd0,0)/boot/grub/splash.xpm.gz title k root (hd0,0) kernel /boot/k root=/dev/sda1 #initrd /boot/initramfs-genkernel-x86-2.6.24-gentoo-r5 |
grubのため一時的なmtabを作ってから、grubをインストール。
|
1 2 3 4 5 6 7 8 9 10 |
livecd / # grep -v rootfs /proc/mounts > /etc/mtab livecd / # grub-install --no-floppy /dev/sda Installation finished. No error reported. This is the contents of the device map /boot/grub/device.map. Check if this is correct or not. If any of the lines is incorrect, fix it and re-run the script `grub-install'. (fd0) /dev/fd0 (hd0) /dev/sda livecd / # |
chrootから抜けてunmountしてreboot
|
1 2 3 4 |
# exit # umount -l /mnt/gentoo/dev{/shm,/pts,} # umount -l /mnt/gentoo/proc # reboot |
しかしchroot内でユーザを作っていなかったのかログインできない。もう一度CDで起動してchrootしてからpasswdでrootのパスワードを設定(biosでCD起動をHDより前に持ってこないとCD起動できない)
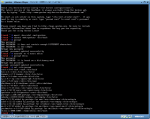
リブートしてログイン

ログインできた。
/にあるダウンロードしたtarを削除してインストール終了。
多分色々動かないが今度はCDなしでできるはず。

